You know everything there possibly is to know about SAP Universe Designer right? Well, I bet that there´s still a trick or two you can discover. For example, there is one function not frequently used in Universe Designer called Table Mapping. This option was originally included in Universe Designer to protect some data to be seen by Developers (the developers´ user group sees the data from a different table than the Business users).
In this article we are going to show how to implement this table mapping feature for the use that it was meant for and we will then apply it in a couple of real life scenarios to provide developers with a simple and effective solution that minimizes the maintenance on their systems.
In order to create a replacement rule, follow the steps below
1. Go to Tools – Manage Security – Manage Access Restriction.
2. Click New to create the new restriction
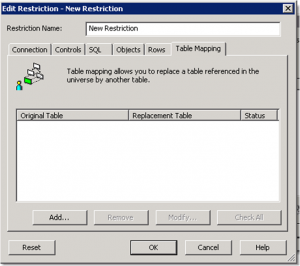
3. Go to Table Mapping and click Add to create the new rule
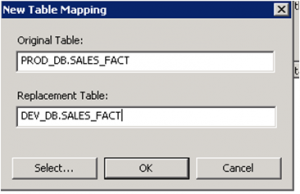
4. Fill in the tables you want to replace. In this case, we want the developers to see the data from the table SALES_FACT of the schema DEV_DB instead of PROD_DB (where we are storing the production data).
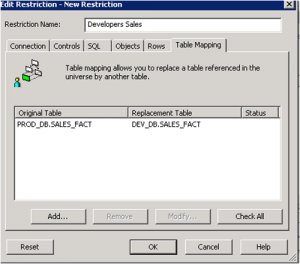
5. Click ok, fill in the name for the rule (In this case Developers Sales) and click ok
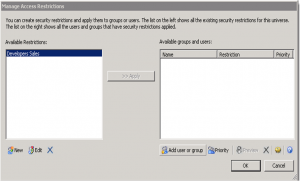
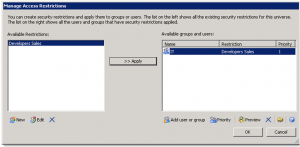
6. To apply this rule only to the user group “Developers”, click on “Add user and group”
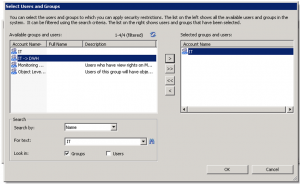
7. Select the group IT, and click Ok
8. Apply the rule to the IT group
Once we have published the universe, all the reports will change the SQL code automatically between the tables DEV_DB.SALES_FACT and PROD_DB.SALES_FACT depending on the user that is logged into the system.
One important point to take into consideration is the priority of the rules: In case of conflict, the restriction with the highest priority – lowest priority index – lowest priority number will apply.
The example we reviewed above (dynamic change between developers and business user tables) is the most typical use for this functionality. However, there are some other scenarios where the table replacement could be very useful:
Scenario 1: We are reloading data on a production table. Previously, we have created a copy of the old data in a temporary table that we want to use for reporting while the reloading has not finished.
Solution: We can add a new rule to replace the original table for the temporary one, and apply it to the group “Everyone”. As soon as the reload is completed we can delete the rule. This process is much faster than renaming the table on the universe and to change all the objects that the universe is using on this table.
Scenario 2: We have different fact tables for different departments with the same or similar table structure and all the dimension tables are common. We are looking for the best solution that reduces future maintenance.
Solution: Instead of creating different copies of the same universe by changing the fact table, we can create one universe and use the table replacement functionality to dynamically switch the fact table depending on the user functional group (in this case would be the department) that the user belongs to.
As we have seen in these examples this table mapping feature provides the developers with simplicity, effectiveness and maintenance reduction on their systems.
If you have any questions do not hesitate to leave a comment below.


